Monday, November 11, 2013

I have working docs - and it only took a year!!

The Journey?

6/7/12 - Met architect and got initial estimate
7/23/12 - Selected architect and started the design. Existing house measured.
9/23/13 - Received initial working docs

whew.. not what i expected, so what happened?

Reflecting back, it's amazing how everything took at least twice as long as you'd have thought. I'd say that ultimately the time lost boiled down to a few key categories..


  1. The given person that you're waiting on to do the work has other priorities and doesn't get to your thing right away. This can turn something that was estimated to take 2 weeks into 4 weeks pretty fast. Especially when you mix in vacations, user conferences, and on and on. All that you can really do is be aware of any times that the people you're relying on will be out and be a squeaky wheel when you're waiting on them. 
  2. Time lost reviewing updates/iterations. For one, there is the time that I took to mull things over which could easily be a week or two. Then when you schedule follow up appointments, it almost always cost a week before they have another appointment to come in. These weeks add up and ultimately if the time it takes to get through all this is important to you, make quick decisions measured in a day or two and get that follow up appointment quickly.
  3. More iterations of things then you expected. If you assume happy path and that the given person will do his thing in X weeks and thats it, be prepared to be disappointed. Chances are you'll look it over and somehow need another iteration whether it's due to changes, incompleteness / incorrectness, or being denied and having to resubmit.
Ultimately, my advice if you want to speed this process along is to be diligent on making decisions quickly yourself, and then actively push whatever needs to happen next along. Look for opportunities to do tasks in parallel when possible. Be aware as much as possible of what all needs to happen too - it's not always clear unless you ask.

On the plus side, we got to think a LOT about the design and tweak it along the way while we waited. It's fair to say that the more time we spent on it and thought about it, the happier we kept getting with the results. Every iteration was substantially better then the last. I spent a lot of time flipping through photos and reading articles on houzz, thinking about every detail in the design, measuring out room sizes in my backyard and "drawing" them with tape to see what their sizes felt like when i stood in them, visiting open houses to see what others did, and visiting stores and conventions to look and learn about products. At this point i'm pretty confident there won't be any changes during construction and we are incredibly happy with what we have. We'll see if the first point remains true..


Final Working Docs

In the end what I received was a set of plans merging my architect's work (certain pages starting with the letter "A") with the structural engineer's work (certain pages starting with the letter "S"). The plans essentially doubled in size and were printed out. I also got a project survival kit which was cute. And of course a bill from the architect.


Building Plan Check

It's now time to submit the working docs to the town's building department to do a plan check. They will take almost a month to comment on the plans. In most cases there are at least one round of comments to respond to. Once we respond to the comments, hopefully the plans will pass the plan check and we can start pulling permits to build.

We got the initial comments back after submitting and most of the stuff is minor changes/clarifications in the plans themselves. In addition there are a few things that we need to do.. most notably:

1. Pay the school district developer impact fee of $3/sqft (ouch)
2. Obtain sewer connection permit - my architect will handle this
3. Erect protective netting to prevent heavy equipment from driving on the roots of the tree's on the property next door. Did I mention that i already have a permanent fence between our properties? Sheesh.. Want a good laugh? Here it is (note the orange netting that i put up)..


Costs

So far I've spent the following on everything.. I feel pretty good about the prices I got on everything except the red ones which I probably could have negotiated better.

09/13/11 - $1500.00 - Shed Demolition
10/05/11 - $1100.00 - Tree & Hedge Removal
10/14/11 - $1600.00 - Concrete Demolition
10/21/11 - $5010.00 - Fence Install
05/20/12 - $2770.00 - Termite Fumigation & Soil Treatment

07/19/12 - $1300.00 - Architect Retainer Fee
08/23/12 - $2600.00 - Architect Schematic Design (On Buff)
12/06/12 - $2600.00 - Architect Design Development
01/22/13 - $1705.00 - Town Planning Permits
01/22/13 - $68.20 - Town Permit Tracking
01/22/13 - $170.50 - Town Advanced Planning
08/09/13 - $2200.00 - Town Architectural Review #1
08/09/13 - $148.50 - Town Architectural Review #2
08/09/13 - $68.90 - Town Arborist Review
06/28/13 - $4456.08 - Builder Story Poles
08/05/13 - $2600.00 - Architect Planning Department Review
09/23/13 - $2600.00 - Architect Completion Docs
09/23/13 - $656.00 - Architect Prints (328pgs x $2/pg)
09/23/13 - $295.00 - Architect T24 Energy Report
09/25/13 - $2667.79 - Town Building Plan Check Fee
10/28/13 - $4864.00 - Town School Fee

$42,379.97 Total

$14,051.00 - Architect & Structural
$7,028.89 - Town
$4,456.08 - Builder
$4,864.00 - School District


Builders & Bids..

In parallel to getting the plans checked and preparing to pull permits, I need to select a builder. So the final request for bids went out to several different builders to see what comes back. I learned earlier that the best way to do this is to ensure that each builder quotes the exact same thing. To that end, I wrote up some builder's instructions to try to be specific on what I expect them to build and thus what to bid.

I know that people say you should get at least 3 quotes however over time i've learned that unless i get at least 7, I don't feel like I get an accurate gauge of what something costs. Thus i've decided to ask 7 different builders of various types/sizes to quote my project. We'll see what comes back..


Builders Instructions

I wrote up a document to detail what i want the builder to do and not do including highlighting things that may not be clear looking at the plans alone.. This will serve not only to be as specific as possible as to what to bid but also once construction is underway it'll serve as a documented list of everything that I expect to be done in writing so nothing gets lots in verbal communication. Here is this list so far:


My main goal is to build the house itself (the structure) all the way up to the drywall with all the bones/roofing/windows/plumbing/electrical/hvac/insulation/exterior done with quality products. I.e. the house itself. My limited budget will more then likely have me doing a fair amount (perhaps all) of the interior work that i might be able to do (finishings, painting, flooring or really anything that i could in theory do).


Major Items to bid:


Foundation
Framing
Drywall
Electrical
Plumbing
Roofing - Gaf Timberline Ultra HD Birchwood (not the landmark pro specified on the plans)
Insulation
Windows - Anderson 400 Tilt-Wash in gray (ideally Benjamin Moore AP-700 color)
Exterior (all - paint, lighting, porches, etc).
Siding - concrete fiber (or whatever product lasts longest and is low maint)
HVAC
Interior lighting (LED for recessed. I have non recessed lights & ceiling fans already but just need them installed)
All exterior doors.
All electrical outlets
All light switches
MBA shower
All Toilets (reuse existing 2 toilets + buy 2 new ones)
Bath tub upstairs second bathroom installed (reuse an existing)


optional items to quote that i might end up removing and doing myself:


interior doors
interior trim (base boards, windows, door, crown molding)


Specific Items to bid that may not be obvious looking at the working docs (or aren’t on them):


Ethernet from family room to each bedroom
Electrical cable conduet from family room to MBR (for future ease of cable runs)
rear ceiling audio speakers + hookups to home theater receiver / tv for family room
Dimmer light switches everywhere except:
1. exterior lights on the right and left sides of the house
2. rear porch steps
3. hallway closet light
New water line to street. Split for future irrigation before entry to house?
New sewer line to street
Tankless, colored pex, manifold water system for first floor near kitchen
Tankless, colored pex, manifold water system for second floor near MBA
Separate furnace and a/c for first and second floors
Rear porch steps lighting for each step.. Both sets of steps
Front & Rear porch covered in bluestone
Two outlets near top of pergola for x-mas light ambiance (as noted on plans)
reinstall existing kitchen refrigerator
reinstall existing kitchen range
reinstall existing laundry washer and dryer


Do not bid the following items (I plan to do them myself):


Interior paint
Interior hardwood flooring
Interior carpet
Kitchen cabinets, range, countertops, sinks
Bathroom work not specifically highlighted above


Friday, September 20, 2013

The wait for working docs..

Working Docs

Ah yes, wrapping all this design stuff up to where you finally have a set of docs to get permits, bid, and build the project. While waiting for the structural engineering to complete, we focused on a few things..


Lighting

Part deux. I've been spending a lot more time looking at lighting. Picking exterior and interior lights. Learning about recessed lighting knowing that questions of which light to buy are coming. So we went and visited a few nearby lighting shops to see what we could learn and it's changed my mind from CFL (fluorescent) to LED lighting (particularly for the recessed lights).

The main reasons people tout to select LED over CFL for recessed is:

  • Last longer (~25k hours) vs CFL's which in a recessed application don't last the claimed 10k hours due to heat. They've seen them only last 1.5-2 years. This seems like a pretty compelling argument.
  • Draw less energy then CFL
  • CFL's have mercury in them and must be disposed carefully. This is true.
  • CFL's initially only light up to ~80% brightness and can take several minutes to reach full brightness. You're often out of the room in 30 seconds. While true, this didn't matter to me much since they were plenty bright.
  • LED's function more smoothly in a dimmable application. I don't know how true this really is.
  • LED's have a more pleasant color. I don't know how true this really is.
  • LED's project light more evenly distributed. This looked true in the lighting store but was mostly negligible.

For me the first three arguments weigh more on my mind and might be worth the added upfront cost for less headache down the road. The others make some sense but I thought were mostly negligible in the sense that I wasnt convinced that there was enough of a problem there to warrant a higher upfront cost. As a whole though, going LED does carry some merit when you look down the list.

Story Boards

Influenced by my years of watching various HGTV and DIY programs, we started a set of story boards to plan out what furniture, lighting, materials, and colors each room will get. you see this sort of thing done a lot on interior design type shows. As we run around shopping (or search on the internet), we print out and staple photos or materials of things we like on said boards. Ideally at some point the story board will give us an idea of what each room will look like and if the items work together (as well as the rest of the house). It's been very helpful to visualize in what direction we want the room to go..


Landscaping

We met with the landscaping designer referral that my architect recommended. She described the general process and what she does. Threw some ideas around, showed us some of her work to give us an idea of what she does. She had a quirky book-like and nature-like personality with what was clearly a sort of studied background (i.e. she's been doing this 10+ years and specifically studied the field before then and it resonated in things she said).

The whole design is basically her marking up my plans with landscaping layouts and elevations. Working with us on things we like and want (a series of meetings and revisions). It takes about 4 weeks she estimated. Her estimate came back at $1200.

We then went to a home show nearby and spoke to several landscapers there. they all quoted a design cost of $1000-$1200 so pricing for the design seems to be somewhat consistent. The estimates for doing landscaping for a property such as mine (based on my description) tended to vary from $25k-$40k or so the landscapers thought.

Much like with the architects and builders, each had different personalities, backgrounds, and experience. Since there is no real way to know who might do the best job and given prices are similar for the design, I find myself left to evaluate them based on their personalities, their background, and perhaps mostly importantly their portfolio of work. We definitely thought some people's portfolios of photos looked better then others..

One interesting guy that we met did nothing but exterior lighting. He showed a fair amount of pretty nice work where he put lighting down to light up pathways, trees, pergolas, etc.. Basically he comes in after your landscaping is done and will design your whole property and install quality LED lighting for what seemed like not a whole lot (~$2500-$3000). I might explore doing that sometime down the road so i kept his card (his business is called Epic Lights)..

Anyways, for now we won't be affording any of that yet so it was more exploratory and educational then anything.

On a related note, we visited an open house at a nearby residence and liked what they did for some plants which is inline with what we'd like to do for a small herb garden..


Structural Engineering

While waiting for my structural engineering, I learned a few minor details from my structural engineer. He is not dong a site visit to do his part of the work on the plans since in my case the entire roof framing is being removed. Also, a common question around here, which I also asked, is what magnitude earthquake can the house withstand? Well, to that, there is no real answer. The structural engineering gets done to building code which tends to get revised every 4-5 years based on the performance of the houses in recent earthquakes.

In the end, this whole process took longer then I anticipated mostly due to vacations and things that i didn't factor in. The structural engineer seemed to also procrastinate without me pushing. I originally was told it'd take him about 2 weeks but when you add to that vacations and the fact that he doesn't necessary start right away, it ended up being about 5 weeks.

I wasn't sure what to expect back from structural engineering but now that I got the pdf's of the design back, it looks like a lot of mumbo jumbo to me. What it essentially shows is all the detail around the home's framing, roofing, and foundation. What size beams and boards go everywhere, how they're to be connected, what directions they run, and so forth. To me it looks like all the detail a builder needs to build the home. Here is some of what it looks like..


In the end when my architect and I reviewed the work, there were enough things wrong that we sent it back to him for corrections. Things like asking him to highlight certain things better, correcting the fact that he put a sheer wall in where there wasn't supposed to be one around the staircase, and his marking some parts of the plans as existing construction when in fact it was new construction. Nothing terribly major but enough to where we wanted to fix it before submitting it. The biggest one was probably the sheer wall which was then replaced with a steel beam. Unfortunately for me, steel beams are expensive but in my case it allows me to retain the wide open great room design that i'm after without an unsightly column. Having your architect review the engineers work and walk through it with you particularly pointing out any added columns or bulkheads that it might be adding was well worth it. In my case no columns or bulkheads were added..

T-24 Energy Report

This was a X page document with more mumbo jumbo that I mostly don't understand due to it's technical nature that outlines a lot of HVAC, plumbing, insulation, and electrical requirements and figures. It basically tells everyone involved what minimums need to be satisfied from an energy standpoint. One interesting thing that I spotted is that one of the minimums it outlines is that for lighting of different wattages, what the minimum lumins need to be. 

The View


On an unrelated note, I climbed up on top of the roof the other day to see what my view might look like from the 2nd story master bedroom and stitched this panoramic together. Not quite as nice as i'd hoped but you can sure see a lot more. The trees block my view of the mountains more then I anticipated and I realize I can sure see a lot more of my neighbors up there (but thankfully not too much into their backyards)


Tuesday, July 23, 2013

Approved!!!!

After a 10 day period of waiting for comments from the neighbors on the notification letters, the town informed us that there were no comments and the plan design is approved. I guess those bottles of wine I brought my neighbors paid off ;-).. j/k.. I didn't really do that. Did I mention that my neighbors are great? :-D

So I met with the architect to start working on the working docs. This is where the electrical, lighting, structural, and plumbing engineering work gets done. At the end of this phase, we will have a full set of engineered plans that a builder or contractor can bid work and build the house from.

Lighting & Electrical

The first session walking through the electrical and lighting was more or less what I expected. The architect went room by room adding somewhat standard lighting asking what I wanted and what lights would be connected to what switches. Apparently i'm a minimalist compared to most because he commented several times that usually everyone wants switches everywhere with complex switch schemes. I wanted to minimize the number of switches to only whats needed.

These days, there is apparently an emphasis on energy efficiency thus most of my lighting will have to be fluorescent or LED. I did some basic research and at this time think LED isn't worth the increased cost for it's marginally better energy usage. Fluorescent - it seems - lasts 10 years give or take while LED can last 25-30. However, LED is significantly more expensive, isn't as big a drop in wattage usage as i'd thought over FL, and ultimately i'm leaning towards using LED either nowhere or only on lights that will be on a lot (exterior?). Frankly, i'm concerned that they'll even make the bulbs for either 10-30 years from now and can see myself being forced to change the fixtures because the bulbs or fixtures no longer exist. Or more likely, that trends change every 5-10 years so you'll be changing them due more to style then energy usage or bulbs.

The other interesting item i've learned is around what lighting is optimal for a room. Houzz has some excellent articles on lighting that i saved and thought about..

5 questions to ask for the best overall lighting
Universal bath design: Light your bathroom for all ages and abilities
10 ways to get your lighting right

I tried to take some thoughts from each of these articles and ultimately, to try to use a combination of lighting for each room (table/floor lamps, recessed, pendents, accent and wall lights). 

Ultimately I walked away with a set of plans with both lighting and electrical to consider. I'll return soon to make some tweaks after i've had a chance to dwell on it for a bit.

Structural Engineering

Here the architect sent the plans off for bids from 3 different structural engineers. I can't say that I was terribly surprised when the bids came back all over the place for essentially the same work. The amounts ended up being $6300, $4300, and $2800. I was originally told to expect around $4000-5000. So after some due diligence on checking each of their backgrounds and being told all three were competent by the architect, I went with the cheapest. $2800 it is! It feels good to save money where you can ;-)..

So I signed the letter and sent off the retainer to get that started. It's estimated at 2 weeks but supposedly this guy is a bit slower then average so we'll see how long it takes.

Ray Tracing

I learned that Chief Architect supports ray traced images so I went ahead and started creating some which is pretty neat. It takes many hours to make just one image if you do many passes for a higher quality image, but the results are a lot more realistic then the default screen grabs and it does a good job with lighting. Since I had some preliminary lighting in the plans it was a good time to play with it. Here are some shots..


I'm eager for the next phase which for me will be more nerve wracking and thats to get bids for doing the work from 3 different general contractors. This will ultimately determine whether or not i have a project that i can move forward with (i.e. afford) or just a set of pretty plans that i can stare at.

Monday, June 24, 2013

A second time submittal

We actually thought that the two alternative designs that the architect came up with were downright ugly. Here they are..


After dwelling on them a bit, it occurred to us that perhaps the direction we were being steered in wasn't that of preserving the historic nature so much as it was being in line with the rest of the neighborhood. So we decided to modify the plans to incorporate some of his ideas but also in a direction that we originally wanted. We put in the front and the porch we'd wanted from the beginning! We played with some designs where we wrapped the porch around the corner, used more craftsman like columns and gable roofs, and added a french door leading out to it.

We were thrilled with the results..


After submitting the revisions and some more waiting, the town architect approved!!!

It was time to send out the notification letters to the neighbors and put up the story poles. The story poles is a requirement in my town (did i mention they're strict here?) whereby a contractor comes out and erects this orange netting structure to show the neighbors what the outline of the proposed house looks like. One of the builders i'd been talking to was willing to work on it and it took them about a day and a half to put up..


If you look, you'll see the outline of the house roof line in the orange netting. The gables, the porch, the 2nd story, etc. 

The notification letters also went out. Essentially it allows 10 days for the neighbors to comment on the proposal. If nobody comments, the plans are automatically approved and we get to move forward with working docs (the version of the plans that include electrical, structural and plumbing that a contractor can build from). If someone comments, then we have to schedule and have a hearing with the town to listen and respond to any comments they have. Typical comments can be sun/shade or privacy issues.

Putting up the story poles ended up costing me $4,456.08 which comprised of $946.08 in material and $3,510 in labor ($65 x 54 man hours). I should have bidded that work out to multiple contractors as I bet I could've had it done cheaper but oh well - live and learn.


Friday, June 21, 2013

A First Time Submittal..

As we approached a design that we were happy with, we were asked to select some finishing materials. Those materials needed to be put in with the submittal so that the town could see what they were. They included:

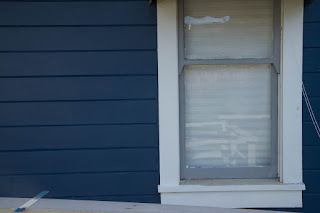
  • Exterior Colors - We walked around the neighborhoods looking at countless houses, thumbed through paint color books for historic homes, and flipped through countless exterior photos on Houzz. We figured out that we wanted to pick three colors - a primary color, a trim color, and some kind of accent color.. These two in particular influenced our early design choices (and you can see our attempts at painting samples on the back of the current house)..

(notice the green paint underneath the blue in the below photos?)


Ultimately this later one is the direction we went..


Primary - Benjamin Moore Van Deusen Blue HC-156 (blue main house)
Secondary - Benjamin Moore Cloud Nine 2144-60 (white trim)
Acent - Benjamin Moore Storm AF-700 (gray accents)

  • Roofing - Another educational experience was learning about roofing products. We knew we wanted a long lasting 50 year roof but after that, what? So we went to look at products at a distributor, narrowed down our choices, and then found some real life houses with the products on them before settling on a product. I was very conscious of the fact that whatever I picked I was stuck with probably for my life (yikes!).. Ultimately, we felt that a lighter product contrasting with the main house color would be best. Something long the lines of what was already on the house. Here are some shots from a nearby new construction of the product we thought would look best..


  • Exterior Lighting - This one was easy.. we just thumbed through craftsman homes on Houzz and told the architect to pick exterior lighting "like that".
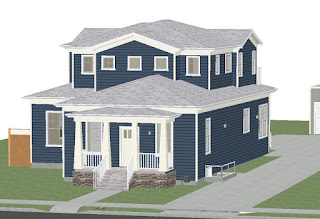
Once selected, the architect put everything together in a package and sent it off to the town for review and approvals.. This is what it looked like at this stage.. 


We were pretty happy with it except for the porch which we'd have liked to have done more with. But the architect continued to steer us towards limiting modification of it to pass the town architect's critical historic eye. We would have also have liked to have had gable roofs instead of hip roofs however again the view from the street needed to maintain the historic look so the hip roofs stayed.

But, a month later we got our response and the town architect wasn't thrilled with some things...  sigh...

The Early Design..

After an initial payment, my architect came out and measured the existing home, created it in Chief Architect, and scheduled a meeting to start the design process.

Now what I wanted on my initial wishlist was..
  • 2nd story master bedroom with a view and lots of windows towards the nearby mountains from both the bedroom and bathroom
  • master bath with 2 sinks, stand alone tub, stand in shower for 2 w/bench, enclosed toilet area
  • large master bedroom walk in closet
  • redo the floorplan to incorporate a great room with lots of windows towards the rear/mountains
  • open up the floorplan
  • all bedrooms should have walk in closets, not regular closets
  • laundry room
  • pantry
  • coat closet near entrance
  • good sized deck area in back with pergola
  • craftsman style
My town is rather strict with it's rules and regulations and worse yet, my home was considered historic since it was built before 1940. That meant that there would be restrictions around what I could or couldn't do and the town architect would ultimately need to approve the design. The perception was that I had strong limitations to what I could do with the existing front of the home.

The initial designs were rough going, trying to accommodate what we presumed would be the town's wishes. How do you preserve the historic nature and look of the house while slapping a large addition and even a second story on it (short of putting it all underground - you don't!)? The front presumably had to be kept similar to what it already was, meaning I couldn't mess with the roofing (hip roof) or porch or windows much. That made for some ugly early designs after incorporating my wish list..


On our second visit we decided to move one of the bedrooms on the 1st floor to the 2nd to create some better symmetry and balance. We also spent some time on the interior spaces, cleaned and opened up the front porch a bit more, and put in a fence along the property line to show relative size. If you look closely, the front porch fence was altered to more of a fence style and the roof was raised to give better visibility to/from the windows.


the great room looking through the kitchen towards the front door


The great room looking towards the back of the house. To the right is the dining room and to the left is the family room with fire place.


Things were coming along but we were not yet ready to submit anything to the town for approval. The symmetry still bugged us and we felt the outside of the house was still too ugly when viewed from the front..

Renovation Decision Making & Affordability

My initial thinking was that I probably had just enough money to redo the floor plan and to do an addition of some kind. My dream was to perhaps even add a 2nd story, but I wasn't sure just what I could afford. I needed to figure that out and I didn't want to borrow money to do it. I also needed to learn about how this whole process works. I'd never done anything like this before :-\. We started to walk around different neighborhoods taking photos of homes we liked for ideas.. 


The architect I ended up choosing did this new construction that I liked nearby.. That's how I found him.


It doesn't look it but this was a renovation that involved remodeling the inside, extending the first floor, and adding a second story. I thought that it was very nicely done especially the interior.


This one is more or less identical to mine but they put a full basement underneath and preserved much of the historic look.. The town might force me down the road to doing something like this due to it's historic nature even though it's not really what we want.


I thought about how to save money on such a project. Perhaps be an owner builder and work with the contractors directly. Perhaps do some of the work myself (i'd done some projects with my brother the past few years such as adding hardwood floors and painting).

So I started learning.. I figured I needed to learn something about construction, architecture, town permitting, and design. Here are some of the things I began spending a lot of time doing..


  • watching DIY - Renovation Realities, Rehab Addict, Sweat Equity
  • watching HGTV - Sarah's House, Property Brothers, Income Property
  • reading websites and books on being an owner/builder such as www.boyh.com
  • poured over floorplans on various websites for ideas and to see if i could simply buy a floorplan.
  • visited my town's planning department
  • went to a couple of home renovation shows in my area and started talking to builders about the process
  • explored various ways of financing such a project (out of pocket, equity loan, construction loan)
  • my town offered a historic homes architect tour where I got to visit 5 different historic homes that had been renovated

Ultimately, I decided i needed an architect and a builder. That I wasn't going to try to manage such a project myself. The funny thing about both is you quickly learn they come in all shapes and sizes. Some builders are larger with their own offices and staff including everything from a receptionist to their own architects, finance, and project managers. Some are smaller without any real office or overhead.

Architects aren't much different. I met everything from the new kid with a master's degree from a good architecture school with a few years under his belt to the firm with it's own office and multiple architects working for it.

I spoke to 5-6 of each with a variety of sizes and not surprisingly, those with the overhead were more expensive while those that were younger or didn't have the overhead were less expensive. Give my limited budget, I decided to lean towards that sweet spot of someone that seemed competent & trustworthy but without all the overhead that i didn't want to pay for.

I have to say that the architects that came out all were quite different. Some had great qualities such as bringing great materials, explaining the process, listening, providing input, and showing competence. Some had the reverse qualities. Prices ranged from what seemed inexpensive (under $10k) to the outrageous (Around $50k) despite all of them essentially offering similar services. 

Ultimately, two in particular stood out and I chose one and plopped down my initial couple of thousand to start the design..